Monday, August 31, 2015

Loom Knit Doll Hat Project -- The Last Rose of Summer

I've got a goal to have knitted at least fifty doll hats within the next fifty days to sell at a huge neighborhood yard sale in the fall.  To my surprise, I found there were very few doll hat patterns available for free on the internet.  This is a pity since a doll hat is a very good project for a beginning loomer and it isn't always obvious how a full-sized hat pattern should be changed to be appropriate for a doll.  Therefore, I've decided to share my notes on creating and converting hat patterns to fit 18" dolls (such as the American Girl, Journey Girl, Our Generation, or My Life dolls).

The Last Rose of Summer -- An Eyelet Stitch Hat
Well, dear Reader, we made it!  Fifty doll hats in fifty days!  I've really enjoyed trying out all these new stitches and have a table full of adorable miniature toboggans.  Now all I need are some buyers...
 
I couldn't end this project without including at least one eyelet stitch.  As has been my practice, this is a very easy eyelet that shouldn't give you much trouble.  Be sure to knit the row before you begin your YO's very loosely so you'll have enough give to be able to easily move your stitch to the next peg.

[Special thanks to my lovely dolly model, Cynthia (who seems to have claimed this hat as her own).  Couldn't ask for a more beautiful and patient photographic subject... except for the day she kept sliding off the table and kicking certain hats to the floor... but that day was definitely the exception, not the rule.]

Good luck and good looming!

Pattern Information

Knitting Loom:  Knifty Knitter 24 peg "Preemie" loom and and loom with more than 4 pegs for the second part of the brim.

Yarn:  
     Color A:  Red Heart "White" #4 size yarn
     Color B:  Red Heart "Burgandy" #4 size yarn
     Color C:  Red Heart "Sage" #4 size yarn

Skill Level: Intermediate

Abbreviations:
     k = knit
     p = purl
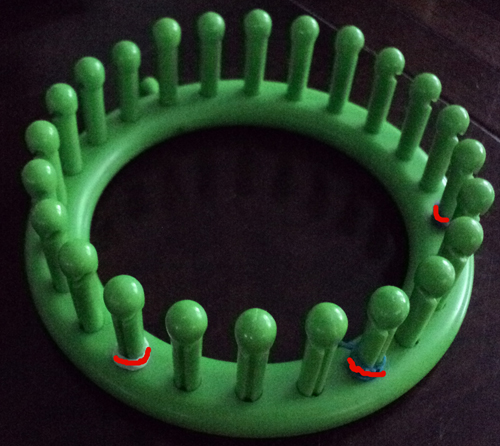
     YO k2 tog = Take loop off peg. Move to next peg. Knit both of these stitches.

Instructions:

With Yarn Color A, cast on 24 pegs.

BRIM  (Part One)
Row 1:  knit to the end Row 2:  purl to the end

Row 3-6:  Repeat Rows 1 and 2


BODY
Row 7 and 8: knit to the end
Row 9: *k2, YO k2tog, k1* Repeat to the end
Row 10: knit to the end

Row 11 and 12: knit to the end
Row 13: *YO k2tog, k3* Repeat to the end
Row 14: knit to the end

Rows 15-40:  Repeat Rows 7 - 14

Bind off using gathered removal method

BRIM (Part Two)

On any loom with more than 4 pegs, cast on four pegs. (I got this stitch from this blog Lace Edging)

Row 1:  k3; then knit seven times on peg 4
Row 2: (working back to the left) p3
Row 3: k3 (you do nothing to peg 4)
Row 4: p3 (do nothing to peg 4)
Row 5: k3 (you do nothing to peg 4)
Row 6: p3 (do nothing to peg 4)

Rows 7 - 42:  Repeat rows 1 - 6


Knit Row 1 to Row 42.
Sew Brim Part II to Brim Part I

To make the Rose and Leaves:  Follow the directions given in this video

Scarlet Royal's Rose and Leaf Tutorial

Actually, I did change a few things from the above directions.  The rose I made exactly following her instructions was too big, so I made a second one using just one strand of #4 size yarn instead of two strands.  Also, I flat knitted instead of e-wrapping.  This makes for a smaller flower.

Sunday, August 30, 2015

Loom Knit Doll Hat Project -- Field of Florettes

I've got a goal to have knitted at least fifty doll hats within the next fifty days to sell at a huge neighborhood yard sale in the fall.  To my surprise, I found there were very few doll hat patterns available for free on the internet.  This is a pity since a doll hat is a very good project for a beginning loomer and it isn't always obvious how a full-sized hat pattern should be changed to be appropriate for a doll.  Therefore, I've decided to share my notes on creating and converting hat patterns to fit 18" dolls (such as the American Girl, Journey Girl, Our Generation, or My Life dolls).


Field of Florettes - A Florette Stitch Hat
Well, here we are at the next-to-the-last installment of my loom knit doll hat project, and I choose a stitch that I really need to do a couple more times before I post... However, since it is the next-to-last hat, we're just going to have to go with it as-is...

The Florette stitch is a bobble stitch.  As I said the last time we tried one of these, there are all sorts of bobbles.  The knit stitch that I converted this from called for a more complicated bobble.  If I were to do this stitch again, I might try to do more complex version.  The e-wrap bobbles I substituted are big and fluffy, but leave gaps that don't look very good when the toboggan is stretched over the head.

In the majority of the stitches I have used for my doll hats, the pattern repeats every four stitches.  This pattern, however, repeats every eight stitches.  This does make it a little too big to show nicely on a very small hat.
Pattern Information

Knitting Loom:  Knifty Knitter 24 peg "Preemie" loom

Yarn:  
     Color A:  Red Heart "Sage" #4 size yarn

Skill Level: Intermediate

Abbreviations:
     k = knit
     p = purl
     bb = bobble (e-wrap five times on the same stitch)

Instructions:

With Yarn Color A, cast on 24 pegs.

BRIM Row 1: knit to the end

Rows 2-20:  Repeat Row 1

When you've completed Row 20, find the first stitch (the end of your yarn should still be dangling from it). Loop the first stitch back up over Peg #1.  Continue around the loom until the entire first row is looped back up onto the loom. Knit the last row of stitches over the first row of stitches.

BODY  
Row 21: *p3,k1,p4* Repeat to the end

Rows 22,24, and 26:  *k4,p1,k3* Repeat to the end

Row 23: *p3, k1, p4* Repeat to the end 

Row 25: *p2, bb, k1, bb, p3* Repeat to the end 

Row 27: *p3, bb, p4* Repeat to the end 
Row 28: Knit to the end  

Rows 29 and 31: *k1, p7* Repeat to the end

Rows 30, 32, and 34: *p1, k7* Repeat to the end 

Row 33: k1, bb, p5, then *bb, k1, bb, p5* Repeat to the end

Row 35: bb, p7, then *p3, bb, p5* Repeat to the end 
Row 36: Knit to the end  
Rows 37-45:  Repeat Rows 21-28 
 
Bind off using gathered removal method.
24 peg loom marked with tape

To create a tousle, wind Yarn A around three fingers around 20 times.  Tie a short piece of yarn tightly around the middle of this bundle of yarn.  Cut the looped ends of the yarn and trim to the desired shape.  Sew to the top of your toboggan using your yarn and a tapestry needle.


TIP:  To make keeping track of where you are in the pattern easier, I suggest you employ some method of marking your loom.  In the past, I have used colored "Rainbow Loom" sized rubber bands, but found that I frequently get the bands caught up into my stitches.  I recommend you use duct tape to mark off every fourth stitch as I have done here.

Saturday, August 29, 2015

Loom Knit Doll Hat Project - The Give a Hoot Hat

I've got a goal to have knitted at least fifty doll hats within the next fifty days to sell at a huge neighborhood yard sale in the fall.  To my surprise, I found there were very few doll hat patterns available for free on the internet.  This is a pity since a doll hat is a very good project for a beginning loomer and it isn't always obvious how a full-sized hat pattern should be changed to be appropriate for a doll.  Therefore, I've decided to share my notes on creating and converting hat patterns to fit 18" dolls (such as the American Girl, Journey Girl, Our Generation, or My Life dolls).

The Give a Hoot - Trendy Owl Hat
Under the category of "Everything old is new again," there seems to be a craze for owl designs these days.  Puts me very much in mind of the 1970's style owls from my tweenage years...

I've been seeing a lot of darling crochet owl hats and wishing I could figure out some way to make round funky eyes.  Finally while I was looking at a tutorial on how to make flowers on the 12 peg loom, I realized I had the means to make round and funky sitting right before me the whole time...


Pattern Information

Knitting Loom:  Knifty Knitter 24 peg "Preemie" loom and the 12 peg "Flower" loom for the owl's eyes

Yarn:  
     Color A:  Brown Flecked #4 size yarn
     Color B:  Red Heart "Raspberry" #4 size yarn 
     Color C:  Red Heart "Sage" #4 size yarn
     Color D:  Red Heart "White" #4 size yarn 
     Color E:  Red Heart "Black" #4 size yarn 
     Color F:  Red Heart "Bright Yellow" #4 size yarn

Skill Level: Intermediate

Abbreviations:
     k = knit
     p = purl

Instructions:

With Yarn Color A, cast on 24 pegs.

BRIM  
Rows 1-8:  knit to the end

BODY  
Switch to Yarn Color B

Rows 9-20: knit to the end

Switch to Yarn Color C

Rows 21-40: knit to the end

Remove loops carefully from one side of the loom and place over the pegs on the other side of the loom. Knit together.  Knit across. Remove using chain cast off.

To create the owl's "eyes":  Switch to the 12 peg "Flower" loom. Switch to Yarn Color D.  Follow these instructions for a layered wrap:

Layered Wrap


Layered Wrap

Switch to Yarn Color E.  Follow these instructions for a over sewn center


Oversewn Centre

Over-sewn Center
Switch to Yarn Color F. Follow these directions for a chain cast round:

Chain Cast Round
Chain Cast Round
Follow these directions for a back stitch round.  (Make two rounds)

Backstitch rounds
Backstitch Rounds
Switch to Yarn Color C.  Move a little further up the loop than your last row of stitches. This time working from the center of the loops, make two more back stitch rounds.
More Backstitch Rounds
Switch to Yarn Color B.  Working once more around the loops, make two more rounds of back stitches.
Outer Ring of Back stitches
Remove loops from loom. Thread yarn through loops.  
 
Removed from the loom

Use the tail of the yarn to sew eye to the hat.

Repeat for other eye.


Locate the center of the hat.  Move two rows over and follow this chart to create the pony's right eye:


To make the owl's "beak":  Using Yarn Color F, cast on seven pegs.

Rows 1- 5: knit to the end of the row

Decrease size of beak by moving the loop on peg 1 to peg 2 and the loop on peg 7 to peg 6.

Rows 6-9: knit to the end of the row (on pegs 2 and 6, you will be knitting over 2 loops)

Decrease beak again by moving loop on peg 2 to peg 3 and the loop on peg 6 to peg 5

Rows 10 -13: knit to the end of the row (on pegs 3 and 5, you will be knitting over 2 loops)

Decrease by moving peg 3 to peg 4; knit over; then move peg 5 to peg 4; knit over. 
  • Knit again.  
  • Cut yarn, leaving around an 8" tail. 
  • Remove from peg. Pull tail through loop and pull tight.
  • Using a crochet hook, pull tail through the body of the ear.
  • Thread tail into plastic tapestry needle. Use to sew beak to hat.
Place hat back on the loom to add earflaps
To create the hat's earflaps:  Find the first row of stitches and place the loops of the first row back on the loom.  Be sure that the right side of the hat is facing out as in this photo.

Locate the spot that you wish to be the right side of the hat. Using Yarn Color A, cast on seven pegs over the the original first row of the hat.

Rows 1- 5: knit to the end of the row (The row in this case is the seven pegs you cast on over the original loops)

Decrease size of earflap by moving the loop on peg 1 to peg 2 and the loop on peg 7 to peg 6.
Earflap

Rows 6-9: knit to the end of the row (on pegs 2 and 6, you will be knitting over 2 loops)

Decrease earflap again by moving loop on peg 2 to peg 3 and the loop on peg 6 to peg 5

Rows 10 -13: knit to the end of the row (on pegs 3 and 5, you will be knitting over 2 loops)
Adding Ties to the Earflaps

Decrease by moving peg 3 to peg 4; knit over; then move peg 5 to peg 4; knit over. 
  • Knit again.  
  • Cut yarn, leaving around an 8" tail. 
  • Remove from peg. Pull tail through loop and pull tight.
To make the ties for the earflap, cut a 16" strand of Yarn Color A. Thread through end of earflap.  Cut two 16" strands of Yarn Colors B and C. Thread through the end of the earflap.  Braid strands. Tie securely.


Repeat process on the other side of the loom for the other earflap.

To create owl's "ears":  Wrap strands of Yarn Colors A, B, and C around three of your fingers four times.  Slip wrap off fingers and tie inside the loops. Thread the ends of this tie inside the hat and tie securely.  Wrap a strand of Yarn Color A several times around the loops and tie securely.  Cut and trim the ends of the loops.  Repeat for the other side.

Friday, August 28, 2015

Loom Knit Doll Hat Project -- Sweet Dreams

I've got a goal to have knitted at least fifty doll hats within the next fifty days to sell at a huge neighborhood yard sale in the fall.  To my surprise, I found there were very few doll hat patterns available for free on the internet.  This is a pity since a doll hat is a very good project for a beginning loomer and it isn't always obvious how a full-sized hat pattern should be changed to be appropriate for a doll.  Therefore, I've decided to share my notes on creating and converting hat patterns to fit 18" dolls (such as the American Girl, Journey Girl, Our Generation, or My Life dolls).


The Sweet Dreams Hat
After moaning about how awful my French knots are in my directions for the Bubblegum Machine Hat, I'm at it again!  I saw these darling little hats:

Baby Sheep Hat

And thought, "Oh, I could make tiny, doll-scale sheep with French knots!" Forgetting that my French knots look more like chewed gum than fluffy wool... Oh, well!  Hope springs eternal, I guess.  

I know that your French knots will be perfectly neat and symmetrical and that your mother won't have to say to you,  "Oh, yeah, I can see it's little sheep... if I stand way back and squint..."

Pattern Information

Knitting Loom:  Knifty Knitter 24 peg "Preemie" loom

Yarn:  
     Color A:  Red Heart "Sage" #4 size yarn
     Color B:  Red Heart "Tourqouise" #4 size yarn 
     Color C:  Red Heart "Black" #4 size yarn  
     Color D:  Red Heart "White" #4 size yarn 
  
Skill Level: Intermediate

Abbreviations:
     k = knit
     p = purl
     ew = e-wrap

Instructions:

With Yarn Color A, cast on 24 pegs.

BRIM
Row 1: knit to the end
Row 2: e-wrap to the end

Rows 3-20:  Repeat Rows 1 and 2

When you've completed Row 20, find the first stitch (the end of your yarn should still be dangling from it). Loop the first stitch back up over Peg #1.  Continue around the loom until the entire first row is looped back up onto the loom. Knit the last row of stitches over the first row of stitches.

BODY  
Rows 21 - 30: knit to the end

Switch to Yarn Color B
Rows 31 - 50: knit to the end
 
Bind off using gathered removal method.

To create the grazing sheep:  Cut off around 16" of Yarn Color C.  Thread onto plastic tapestry needle.  To make the legs of the sheep, sew 2 short vertical stitches about a row apart. To make the sheep's head, sew 2 short (shorter than mine, or your sheep will end up looking a little like anteaters) slanting stiches close together.

To make the sheep's body, thread your needle with a strand of Yarn Color C.  Above the sheep's "legs" make a couple of French knots (I made two, but my French knots are big and blobby.  You will probably be able to make for neat, tidy little knots).  Make another knot just behind your slanting stitches to form the sheep's head.  

To create a tousle, wind Yarn A around three fingers around 20 times.  Tie a short piece of yarn tightly around the middle of this bundle of yarn.  Cut the looped ends of the yarn and trim to the desired shape.  Sew to the top of your toboggan using your yarn and a tapestry needle.

Thursday, August 27, 2015

Loom Knit Doll Hat Project - The Pinkie Pie

I've got a goal to have knitted at least fifty doll hats within the next fifty days to sell at a huge neighborhood yard sale in the fall.  To my surprise, I found there were very few doll hat patterns available for free on the internet.  This is a pity since a doll hat is a very good project for a beginning loomer and it isn't always obvious how a full-sized hat pattern should be changed to be appropriate for a doll.  Therefore, I've decided to share my notes on creating and converting hat patterns to fit 18" dolls (such as the American Girl, Journey Girl, Our Generation, or My Life dolls).

The Pinkie Pie Hat
Although I'm starting out, as I always do, by saying that I'm making these hats to sell at a yard sale, this one will not be on the table.  My niece has been a My Little Pony fan since she was a baby (which just seems like a few weeks ago to me.)  Although we've already been through several incarnations of the toys and cartoons, old Pinkie Pie is still her favorite.  I hope she and her dolly will enjoy this creation!

I used Swiss darning again to create Pinkie Pie's eyes.  I think it turned out pretty well... except the hat is too tall.  I failed to allow for the fact that this hat does not have a broad doubled brim.  You may wish to make the  body of your hat ten rows or so shorter.


Pattern Information

Knitting Loom:  Knifty Knitter 24 peg "Preemie" loom


Yarn:  
     Color A:  Red Heart "White" #4 size yarn
     Color B:  Red Heart "Pale Pink" #4 size yarn 
     Color C:  Red Heart "Raspberry" #4 size yarn
     Color D:  Red Heart "Delft Blue" #4 size yarn 
     Color E:  Red Heart "Black" #4 size yarn

Skill Level: Intermediate

Abbreviations:
     k = knit
     p = purl

Instructions:

With Yarn Color A, cast on 24 pegs.

BRIM  
Rows 1-6:  knit to the end

BODY  
Switch to Yarn Color B

Rows 7-40: knit to the end

Bind off using gathered removal method.

To create the pony's "eyes":  Thread about 16" of Yarn Color A onto your plastic tapestry needle.  Follow these instructions for Swiss Darning:

Swiss Darning

Locate the center of the hat.  Move two rows over and follow this chart to create the pony's right eye:


Flip the chart to create the pony's left eye.


To make the pony's "ears":  Using Yarn Color B, cast on seven pegs.

Rows 1- 5: knit to the end of the row

Decrease size of ear by moving the loop on peg 1 to peg 2 and the loop on peg 7 to peg 6.

Rows 6-9: knit to the end of the row (on pegs 2 and 6, you will be knitting over 2 loops)

Decrease ear again by moving loop on peg 2 to peg 3 and the loop on peg 6 to peg 5

Rows 10 -13: knit to the end of the row (on pegs 3 and 5, you will be knitting over 2 loops)

Decrease by moving peg 3 to peg 4; knit over; then move peg 5 to peg 4; knit over. 
  • Knit again.  
  • Cut yarn, leaving around an 8" tail. 
  • Remove from peg. Pull tail through loop and pull tight.
  • Using a crochet hook, pull tail through the body of the ear.
  • Thread tail into plastic tapestry needle. Use to sew ear to hat.
Repeat process to make and attach other ear.

Place hat back on the loom to add earflaps
To create the hat's earflaps:  Find the first row of stitches and place the loops of the first row back on the loom.  Be sure that the right side of the hat is facing out as in this photo.

Locate the spot that you wish to be the right side of the hat. Using Yarn Color A, cast on seven pegs over the the original first row of the hat.

Rows 1- 5: knit to the end of the row (The row in this case is the seven pegs you cast on over the original loops)

Decrease size of earflap by moving the loop on peg 1 to peg 2 and the loop on peg 7 to peg 6.
Earflap

Rows 6-9: knit to the end of the row (on pegs 2 and 6, you will be knitting over 2 loops)

Decrease earflap again by moving loop on peg 2 to peg 3 and the loop on peg 6 to peg 5

Rows 10 -13: knit to the end of the row (on pegs 3 and 5, you will be knitting over 2 loops)
Adding Ties to the Earflaps

Decrease by moving peg 3 to peg 4; knit over; then move peg 5 to peg 4; knit over. 
  • Knit again.  
  • Cut yarn, leaving around an 8" tail. 
  • Remove from peg. Pull tail through loop and pull tight.
To make the ties for the earflap, cut a 16" strand of Yarn Color A. Thread through end of earflap.  Cut two 16" strands of Yarn Colors B and C. Thread through the end of the earflap.  Braid strands. Tie securely.


Repeat process on the other side of the loom for the other earflap.

To create pony's "mane":  I am using Renita Harvey's modified I-cord method of creating corkscrew tousles.  I recommend you watch her video, which can be found here:

 Renita Harvey's Corkscrew Tousle Video

The method is actually pretty simple, but is difficult to convey using conventional knitting notation.  In short, you use two pegs on your loom and wind your yarn in a figure 8 pattern.  You knit four stitches into the first peg and then anchor them by knitting a stitch into the second peg.  Be sure to pull the stitches into the second peg tight to aid the curling of the stitches.  When you are done, it also helps to twirl the spiral with your fingers to give it the shape you desire.  Here's a try at conveying this stitch using knitting notation:

Tie a slip knot in the yarn and place around peg 1
Wrap yarn in a counterclockwise direction around peg 2
Wrap yarn in a clockwise direction around peg 1

Row 1: k1, WYIF k1
Row 2:  ew3tog, k1

Rows 3- 24:  Repeat Rows 1 and 2

Rows 25:  k1, WYIF k1

Take loop off peg 1 and move to peg 2. Knit together.  Pull yarn off peg. Put tail of working yarn through the loop and tie off.

I made eight corkscrews for Pinkie Pie's mane.  You may wish to make even more.  Starting about an inch up from the bottom of the back of the hat, thread tails of corkscrew tousles through. Knot tails securely inside toboggan.


Wednesday, August 26, 2015

Loom Knit Doll Hat Project -- The Bubble Yum

I've got a goal to have knitted at least fifty doll hats within the next fifty days to sell at a huge neighborhood yard sale in the fall.  To my surprise, I found there were very few doll hat patterns available for free on the internet.  This is a pity since a doll hat is a very good project for a beginning loomer and it isn't always obvious how a full-sized hat pattern should be changed to be appropriate for a doll.  Therefore, I've decided to share my notes on creating and converting hat patterns to fit 18" dolls (such as the American Girl, Journey Girl, Our Generation, or My Life dolls).


We all have things in life that we are immediately good at... and others that we never quite master despite our best efforts.  I, for example, make terrible, sloppy french knots... but I never stop trying!


In this particular case, I was inspired to once more trot out my poor french knot making skills because I saw this adorable crocheted bubblegum machine hat


Gumball Hat


As you see, this pattern uses buttons for the bubblegum.  I thought it would be easy to create a knitted version of the design, but I didn't have any tiny buttons on hand.  "No problem!"  I thought.  "I'll just use french knots instead!"  ...Completely forgetting that my french knot tend to look more like chewed gum than bubbles.


Ah, well, hopefully you can do better... or are more well-stocked for buttons!


Pattern Information

Knitting Loom:  Knifty Knitter 24 peg "Preemie" loom

Yarn:  
     Color A: Red Heart "Dark Red" #4 size yarn
     Color B: Red Heart "Dark Red" #4 size yarn

Plus a variety of yarn scraps to use to make the "bubbles"

Skill Level: Beginner

Abbreviations:
     k = knit
     p = purl


Instructions:

With Yarn Color A, cast on 24 pegs.

BRIM
Row 1:  knit to end

Rows 2-20:  Repeat Row 1

When you've completed Row 20, find the first stitch (the end of your yarn should still be dangling from it). Loop the first stitch back up over Peg #1.  Continue around the loom until the entire first row is looped back up onto the loom. Knit the last row of stitches over the first row of stitches.

BODY
Switch to Yarn Color B
Row 21: knit to end
Row 22: purl to end

Rows 23- 40: Repeat Rows 21 and 22


Switch to Yarn Color A

Row 41-50: knit to end

Bind off using gathered removal method.

To make the "gumballs":  Using a variety of colors of yarn, make large french knots in the white area of the hat.  (I am not going to give you any pointers on making french knots because... well, whatever I'm doing, I'm somehow doing it wrong...)

You may substitute sewing in small buttons for the french knots if you wish.

Tuesday, August 25, 2015

Loom Knit Doll Hat Project -- Lil' Lambchop

I've got a goal to have knitted at least fifty doll hats within the next fifty days to sell at a huge neighborhood yard sale in the fall.  To my surprise, I found there were very few doll hat patterns available for free on the internet.  This is a pity since a doll hat is a very good project for a beginning loomer and it isn't always obvious how a full-sized hat pattern should be changed to be appropriate for a doll.  Therefore, I've decided to share my notes on creating and converting hat patterns to fit 18" dolls (such as the American Girl, Journey Girl, Our Generation, or My Life dolls).

Lil' Lambchop -- A Bobble Stitch Hat
When I first started knitting, I thought that all bobble stitches were made in the same way.  Therefore if the instructions for one bobble stitch looked daunting, that meant that all bobbles were challenging. This is not true.  Bobble stitches are like snowflakes -- each one is a little different. Some are very intricate.  Some are quite simple.

The bobble I'm using for this little hat is one of the easiest I've come across.  And you'll get lots and lots and lots and lots of practice in making it in this project -- A perfect cure for bobble-o-phobia!

Pattern Information

Knitting Loom:  Knifty Knitter 24 peg "Preemie" loom


Yarn:  
     Color A:  Gray #4 size yarn (Lost label)
     Color B:  Red Heart "White" #4 size yarn 
     Color C:  Red Heart "Black" #4 size yarn
     Color D:  Red Heart "Raspberry" #4 size yarn

Skill Level: Intermediate

Abbreviations:
     k = knit
     p = purl
     bb = bobble (Knit five times on the same peg.  If you'd like a more fluffy bobble, e-wrap five times instead.)

Instructions:

With Yarn Color A, cast on 24 pegs.

BRIM  
Row 1:  knit to the end

Rows 2-20:  Repeat Row 1

When you've completed Row 20, find the first stitch (the end of your yarn should still be dangling from it). Loop the first stitch back up over Peg #1.  Continue around the loom until the entire first row is looped back up onto the loom. Knit the last row of stitches over the first row of stitches.

Loom with pegs marked for the lamb's "face"
[Normally, I recommend you mark your loom in groups of four pegs.  This time, I suggest you put some kind of mark on pegs 9, 13,  and 17 to help you remember where the lamb's "face" will be stitched in]

BODY  
Switch to Yarn Color B

Row 21: bb, k1, bb, k1, bb, k1, bb, k11, bb, k1, bb, k1, bb, k1, bb, k1, bb, k1
Row 22: knit to the end
Row 23: k1, bb, k1, bb, k1, bb, k1, bb, k9, bb, k1, bb, k1, bb, k1, bb
Row 24:  knit to the end

Rows 25 - 28:  Repeat rows 21 -24

Row 29: bb, k1, bb, k1, bb, k1, bb, k5, bb, k5, bb, k1, bb, k1, bb, k1, bb, k1
Row 30: knit to the end
Row 31: k1, bb, k1, bb, k1, bb, k1, bb, k2, bb, k1, bb, k2,bb, k1, bb, k1, bb, k1, bb
Row 32:  knit to the end

Row 33: *bb, k1* Repeat to the end
Row 34:  knit to the end
Row 35: *k1, bb* Repeat to the end
Row 36:  knit to the end

Rows 38 - 50:  Repeat Rows 33 - 36

Bind off using gathered removal method.

To create the lamb's "eyes":  Thread about 16" of Yarn Color C onto your plastic tapestry needle.  Follow these instructions for creating a chain stitch:

How to Make the Chain Stitch

Chain stitch two semi-circles on either side of the lamb's face.  Make vertical stitches running down from these semi-circles to create "eyelashes."

To make the lamb's "nose":  Thread about 8" of Yarn Color D onto your plastic tapestry needle.  Stitch a triangle in the middle of the lamb's "face" then fill in with stitches.

To make the lamb's "ears":  Using Yarn Color B, cast on seven pegs.

Rows 1- 5: knit to the end of the row

Decrease size of ear by moving the loop on peg 1 to peg 2 and the loop on peg 7 to peg 6.

Rows 6-9: knit to the end of the row (on pegs 2 and 6, you will be knitting over 2 loops)

Decrease ear again by moving loop on peg 2 to peg 3 and the loop on peg 6 to peg 5

Rows 10 -13: knit to the end of the row (on pegs 3 and 5, you will be knitting over 2 loops)

Decrease by moving peg 3 to peg 4; knit over; then move peg 5 to peg 4; knit over. 
  • Knit again.  
  • Cut yarn, leaving around an 8" tail. 
  • Remove from peg. Pull tail through loop and pull tight.
  • Using a crochet hook, pull tail through the body of the ear.
  • Thread tail into plastic tapestry needle. Use to sew ear to hat.
Repeat process to make and attach other ear.